Model 3: custom diffusion per group
Custom distribution by group is the most granular of the three distribution models: it lets you apply different distribution settings to the same capsule depending on the learner group.
Model 3: custom distribution by group
Custom distribution by group is the most granular of the three distribution models: it lets you apply different distribution settings to the same capsule depending on the learner group.
The capsule content remains the same, but whether it is mandatory, promoted or subject to specific visibility conditions can vary from one group to another.
To compare the different distribution models, see Understand content distribution.
When to use custom distribution
Use this model when the same capsule needs to behave differently for different groups, without having to duplicate it.
For example, a safety instruction can be:
- mandatory for workshop teams;
- available for information only to support teams.
A rule always targets a group, never an individual learner or a department directly.
Assigning a group to a rule is also enough to give that group access to the capsule. A capsule can therefore be distributed using custom distribution rules only, without being added to a learning path or catalog.
Create a distribution rule
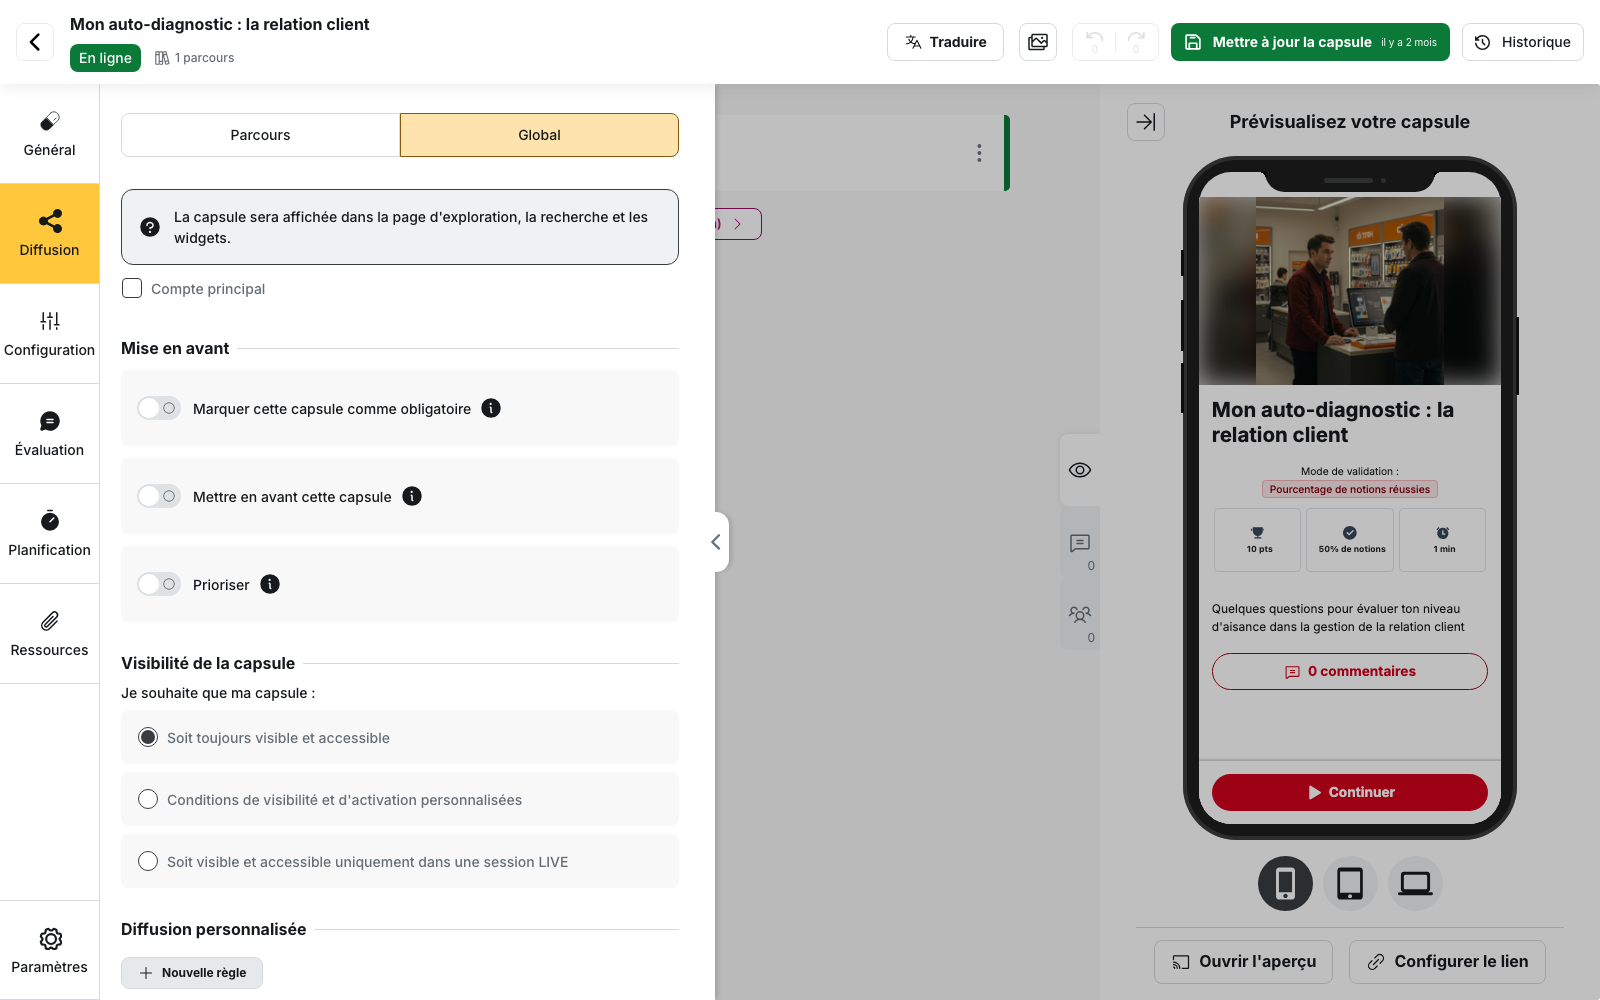
Open the capsule in the editor, then go to Distribution > Global.
In the Custom distribution section, click New rule.
The Add a rule window is divided into two columns:
- Departments, on the left, helps you find groups more easily;
- Groups, on the right, displays the active groups in the selected department.
Departments are only used to organize the selection: the rule always targets groups.
Only departments containing at least one group are displayed. Groups that are not associated with a department appear under No department.
You can select groups from several departments: your selection is kept when you move from one department to another.
Select all only applies to the groups currently displayed. If you have entered a search term, only the matching results are selected.
Click Create rule to finish.
As soon as the first rule is created, the screen is reorganized:
- the Global distribution card appears first;
- the different rules are listed under Exceptions;
- the details of the selected rule appear on the right.
Configure a rule
Each rule has its own settings.
Rule name
The Rule name is required. It is filled in automatically, for example Rule 1, then Rule 2.
If you remove the name entirely, the capsule enters an error state until a name is entered again.
Make the capsule mandatory
Enable Mark this capsule as mandatory to require completion only for the groups covered by the rule.
Promote the capsule
The Promote this capsule option lets you define a promotion period specific to the rule.
This setting is displayed only if the corresponding feature is enabled on your account.
The promotion start date cannot be earlier than the date on which the capsule becomes visible under that rule.
Configure visibility
Under Capsule visibility, you can choose from options such as:
- Always visible and accessible;
- Custom visibility and activation conditions;
- depending on the features enabled on your account, Visible and accessible only from an LMS;
- Visible and accessible only during a LIVE session.
Change the targeted groups
Click Edit groups to reopen the group selection for the rule.
This lets you update the rule’s audience without deleting and recreating the rule.
⚠️ Prioritization cannot be configured per rule. The Prioritize setting applies to the capsule as a whole. A capsule is therefore prioritized for all relevant learners, regardless of which rule applies to them.
To learn more, see Prioritize a capsule.
Understand rule priority
A learner may belong to several groups targeted by different rules.
In this case, only one rule applies in full: the oldest one.
Settings from different rules are not combined. A learner cannot, for example, inherit the visibility settings from one rule and the mandatory setting from another.
Rules cannot be reordered directly. To change their priority, delete them and recreate them in the required order.
⚠️ Do not rely on the number in the rule name. Names such as Rule 1 and Rule 2 are simply suggested when the rule is created and can be changed.
If you delete the oldest rule, the next one becomes the priority rule without changing its name.
Avoid multiple rules for the same group
When a group is already included in a rule, it displays the Has a rule badge.
If you select it again, the back office displays the following message: “Some groups already have custom distribution rules. Adding them will replace the existing rules.”
⚠️ In practice, a second rule can still be created for the same group. The oldest rule will continue to apply.
To avoid duplicate rules and make configuration easier to maintain, open the existing rule and use Edit groups instead.
Check group permissions
A permission model can restrict distribution or statistics permissions to a specific list of groups.
⚠️ This list is not updated automatically when new groups are created. A new group may therefore be missing from your selection or fall outside a rule you expected to apply.
If a new team does not appear in the distribution options, check the permission model first.
To learn more, see Who can distribute what?.
Use dynamic groups
A rule can target a dynamic group.
In this case, the group population changes automatically based on its criteria. Membership is recalculated when:
- the group criteria are saved;
- a user’s data changes, either manually or through HRIS synchronization;
- for relevant accounts, the user logs in through a directory or SSO.
A learner can therefore enter or leave the scope of a rule automatically without you having to update the capsule.
💡 If several exceptions rely on the same criterion, use a dynamic group instead. This simplifies distribution and avoids creating unnecessary rules.
When to choose another model
When the content itself needs to be different
Custom distribution changes access rules, not the content of the capsule.
If two audiences need different text or activities, create two separate capsules.
When the distinction applies to several pieces of content
If the same audience needs access to a full set of capsules, use a learning path assigned to the relevant group instead.
A custom distribution rule must be configured separately for each capsule.
When the rules become difficult to manage
Too many exceptions can make distribution harder to understand: two learners enrolled in the same learning path may legitimately see different content.
In this case, use the Access conditions column in the capsule list to check which configuration applies.
Learn more
- Model 2: distributing content through learning paths: distribute a set of content to a defined audience and track its progress.
- Dynamic groups: update a population automatically based on criteria instead of creating multiple exceptions.
- Common issues: content distribution: identify why a learner is not seeing the content or settings you expected.