The media library
Media are the files you use to build your training content: images, videos, audio files, PDF files and other documents. Once a file is in the media library, you can reuse it in your capsules: when you add an image, audio or document block in the capsule editor, you can pick the file from the library instead of uploading it again.
The media library
Media are the files you use to build your training content: images, videos, audio files, PDF files and other documents. Once a file is in the media library, you can reuse it in your capsules: when you add an image, audio or document block in the capsule editor, you can pick the file from the library instead of uploading it again.
The Media library tab of My content lists the files uploaded to your account. Each file has a record where you rename it, add its tags and alt description, manage its subtitles, download it or delete it.
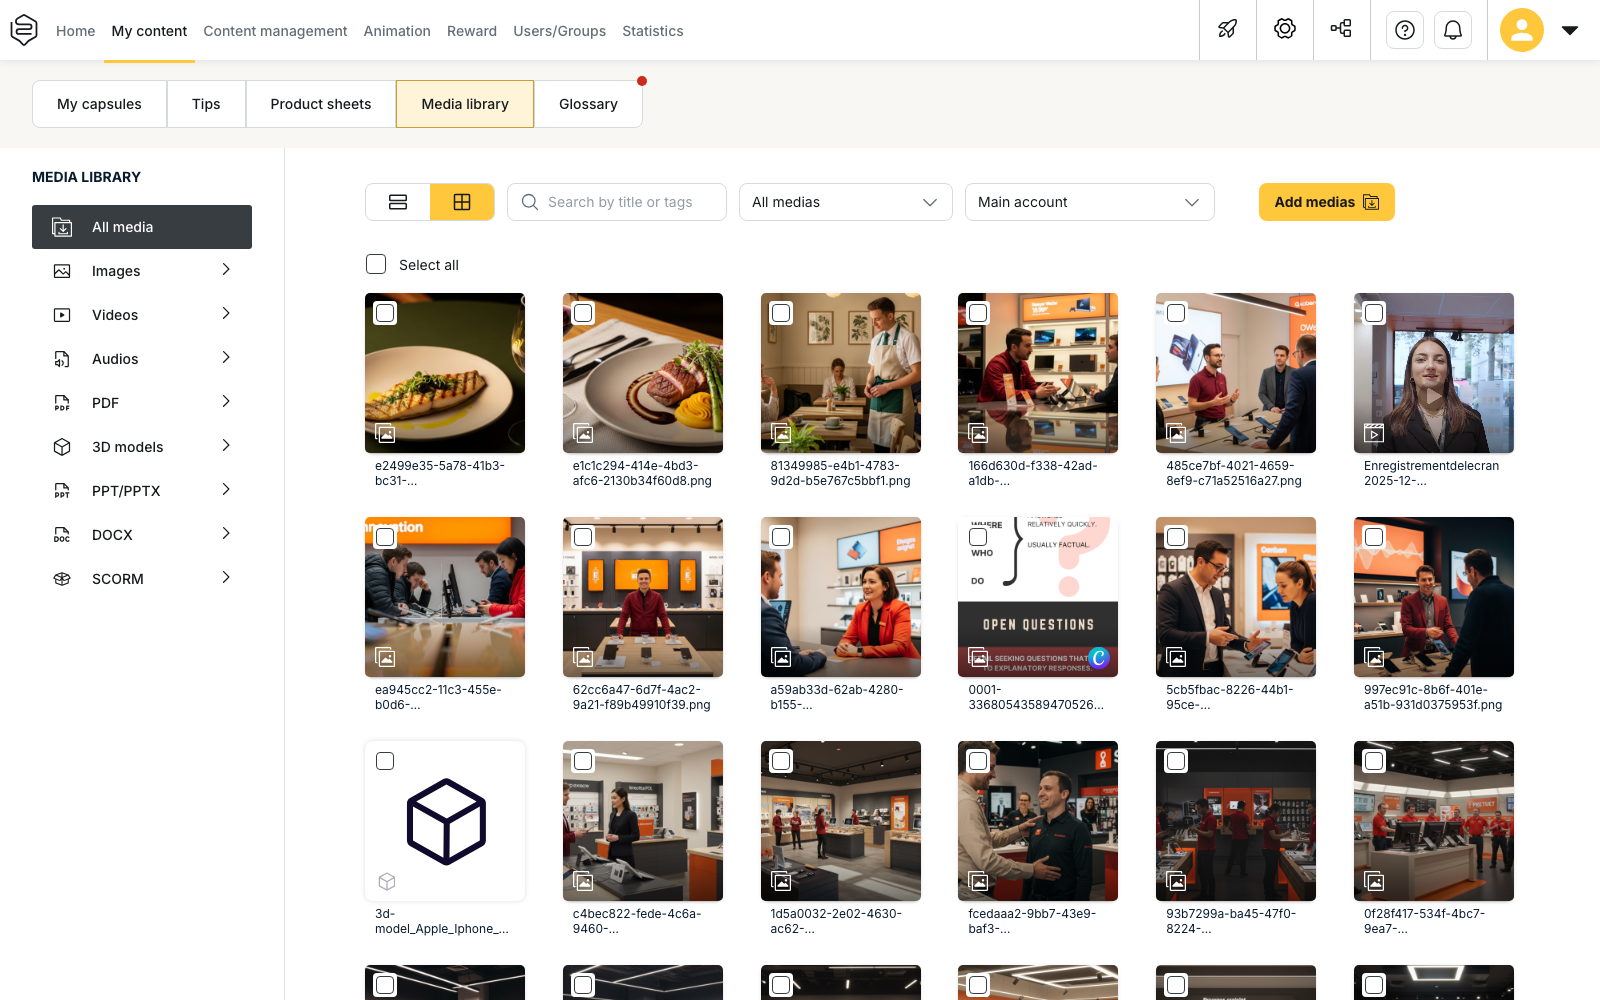
Finding a media
Use the filters on the left of the list to show one type of media, such as images, videos or PDF files. To find a specific file, type part of its title or one of its tags in the Search by title or tags field.
Adding a media
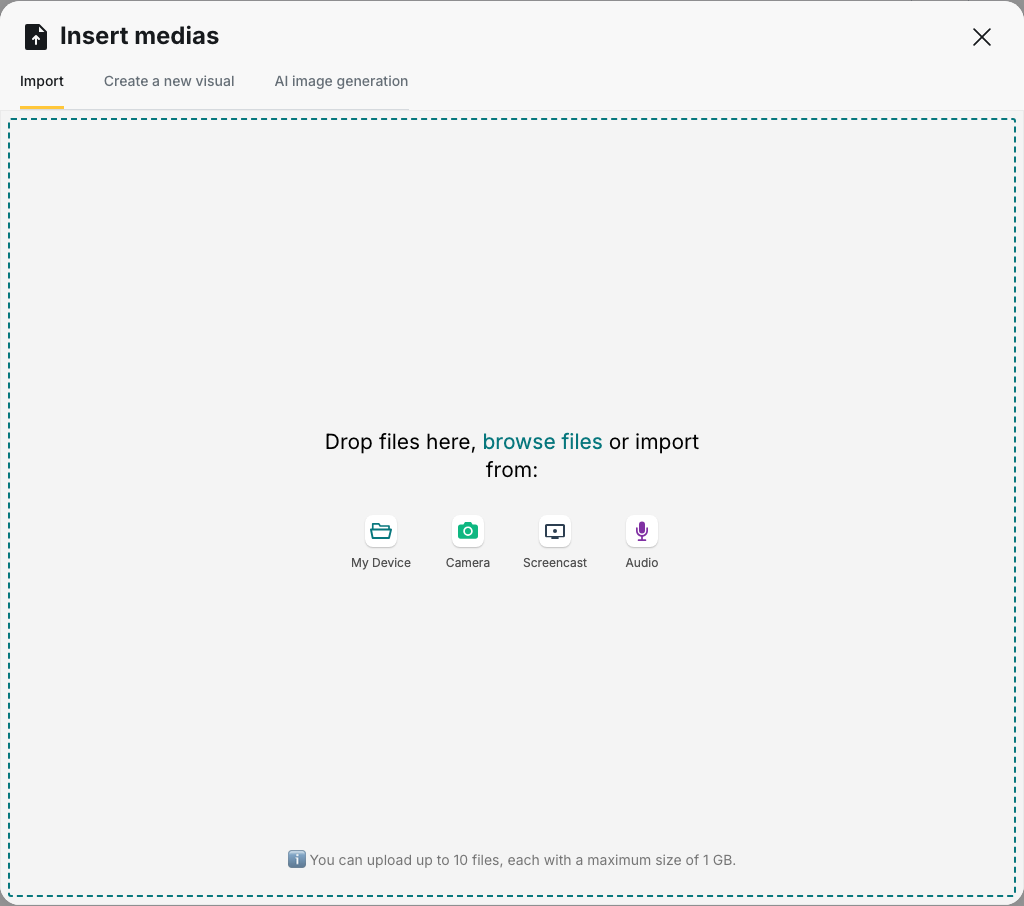
- Click Add medias. The Insert medias window opens on the Import tab.
- Drag and drop your files into the window, or choose a source such as My Device or Screencast.
The window shows its limit: up to 10 files per import, each with a maximum size of 1 GB. Other tabs can appear in this window, depending on the integrations enabled on your account.
Editing a media record
Click a file in the list to open its record. The File Details panel shows the settings available for this type of media.
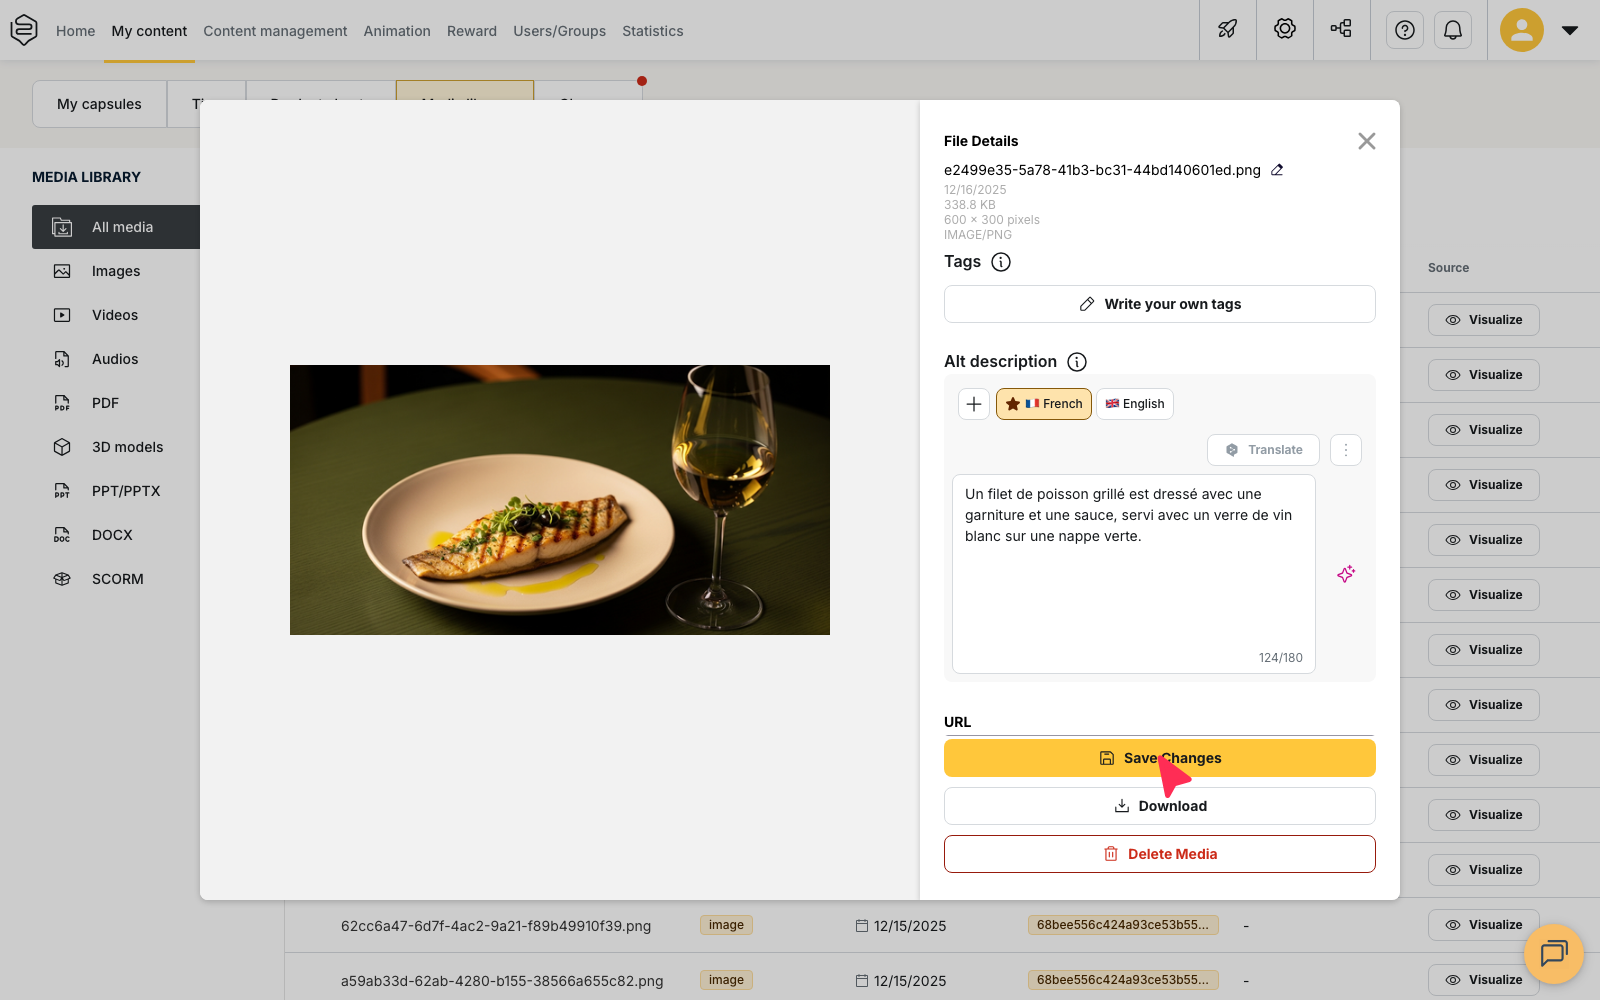
⚠️ Save your changes: the changes you make to the tags, the alt description or the subtitles only apply after you click Save Changes at the bottom of the record.
Renaming a media
Click the pencil next to the file name, type the new name, then click Save Changes.
Adding tags to an image
Tags are not available for every type of media: you can add them to images only. Click Write your own tags, then enter up to 5 tags of no more than 30 characters each.
The following types of media cannot have tags:
- videos;
- audio files;
- PDF files;
- presentations;
- 3D models;
- SCORM and AICC modules;
- other documents and files.
On the record of these media, the Tags section displays Tags are not available for this type of media. To find them in the list, use the filters by type or search by title.
Describing an image
To write it yourself, click Write your own description. To get a suggestion, click Generate with AI. This button appears only if AI content generation is enabled on your account. Review the suggested text before saving it.
The description can be translated into the other languages of your content. On other types of media, the record displays The description is not available for this type of media.
💡 Tip: describe the information the image carries in the capsule, not only its appearance. For example, write “Chart showing sales rising from January to June” rather than “Chart”.
Adding subtitles or a transcript
On a video record, turn on Subtitles. On an audio record, turn on Transcription. The option stays inactive if the video has no audio track.
- Click Generate subtitles or Generate transcription. This button appears only if speech recognition is enabled on your account. If subtitles already exist, confirm that you want to replace them.
- Read the generated text and correct it where needed. The subtitles must follow the WebVTT format.
- Click Save Changes.
To reuse the text elsewhere, click Export in .vtt format or Download .txt file.
Downloading or deleting a media
- To get a copy of the file, click Download on its record.
- To delete one file, click Delete Media on its record, then confirm.
- To delete several files, tick them in the list, then click Delete selected medias.
Deleting a media also deletes its record, including its tags, its description and its subtitles.
Going further
- Accessibility at Beedeez: how descriptions, subtitles and audio description help learners.
- YouTube and Vimeo videos: using a video hosted outside Beedeez.
- Importing a capsule: bringing an existing capsule into your account.