Building the skills framework (coaching)
⚠️ Required permissions: under Edition rights > Skill edition:
Building the skills framework (coaching)
⚠️ Required permissions: under Edition rights > Skill edition:
- Create skills makes the skill creation button available. Without this permission, the button is hidden.
- Update skills allows you to open and edit an existing skill.
To change back-office access permissions, see Assigning rights.
⚠️ Reminder: a skill with no linked content and no milestone remains just an entry in the list. Linking content to the skill enables learners to progress in it.
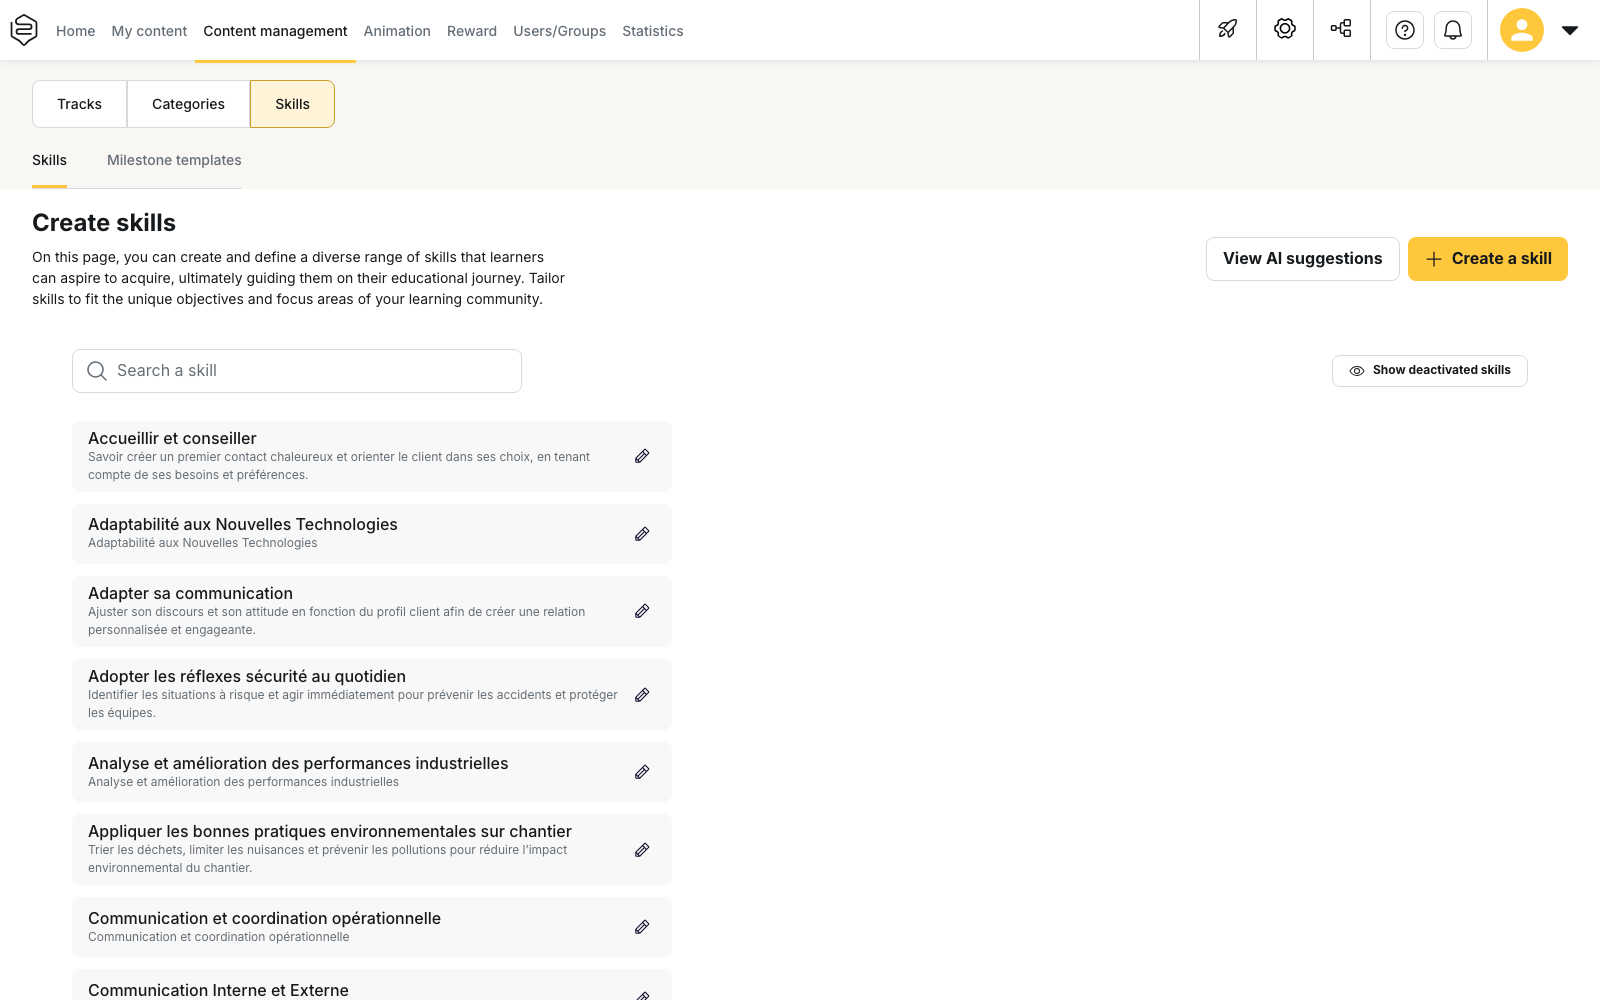
Creating and organising skills
Go to Content management > Skills and click Create a skill. Three options are available:
- Create a skill: add a new skill.
- Create a skills group: organise your skills into folders.
- Scan with AI: generate a suggested skills framework based on an AI analysis of your back-office.
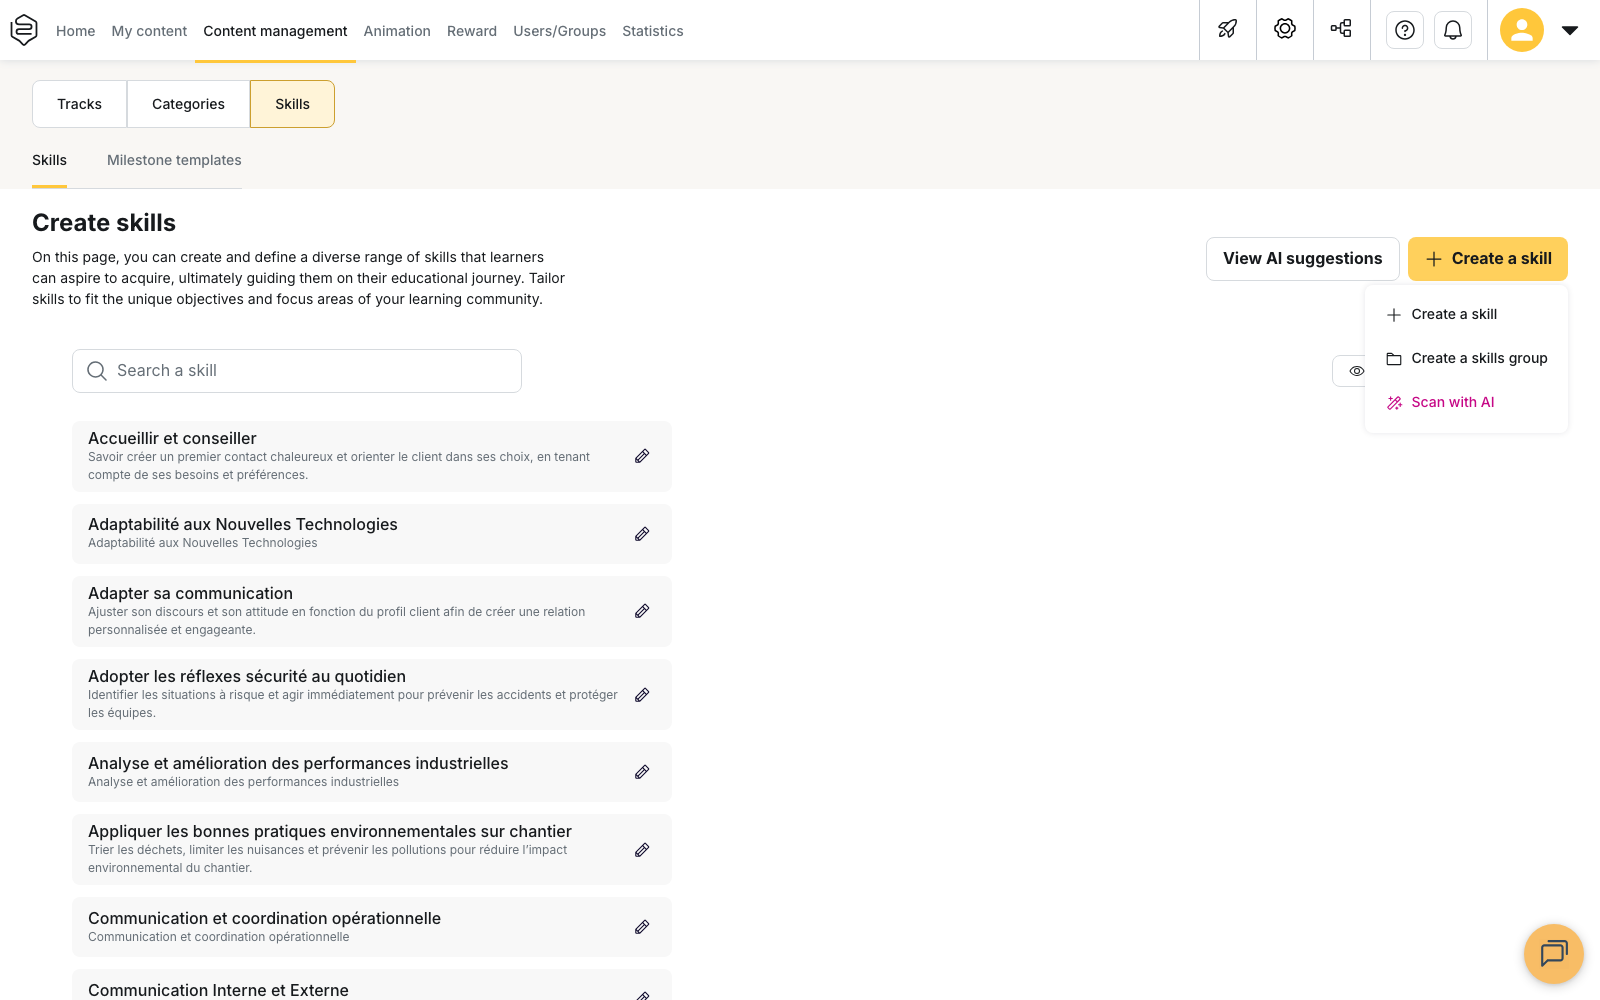
Creating a skill
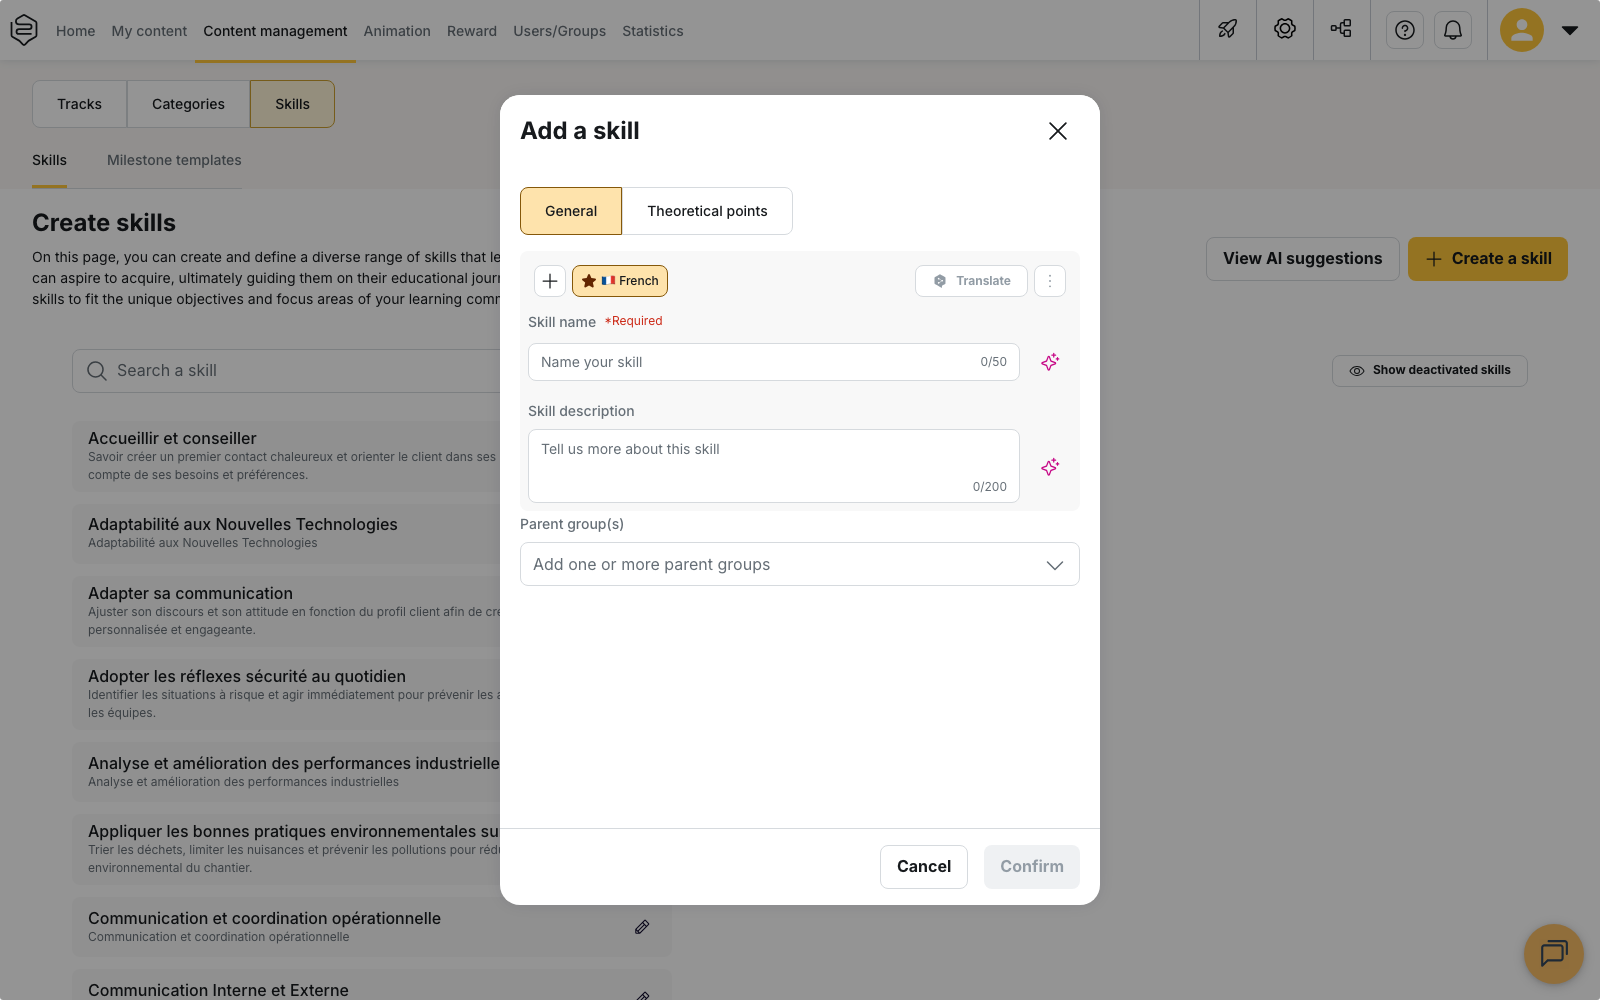
- Click Create a skill, then Create a skill again. A window opens with two tabs.
- General: enter the Skill name (up to 50 characters) and Skill description (up to 200 characters), then select the Parent group(s) the skill should belong to. The description explains what a learner needs to know to master the skill. ⚠️ Translation: : enter the name and description separately for each language. To add a translation, click “+” and select a language. For an automatic translation, click Translate.
- Theoretical points: set the number of points required to reach each level. Each row is pre-filled with a default value. You can set each threshold to a value between 0 and 1,000 points. Learners earn these points through the capsules and tips linked to the skill.
- Click Confirm to save the skill.
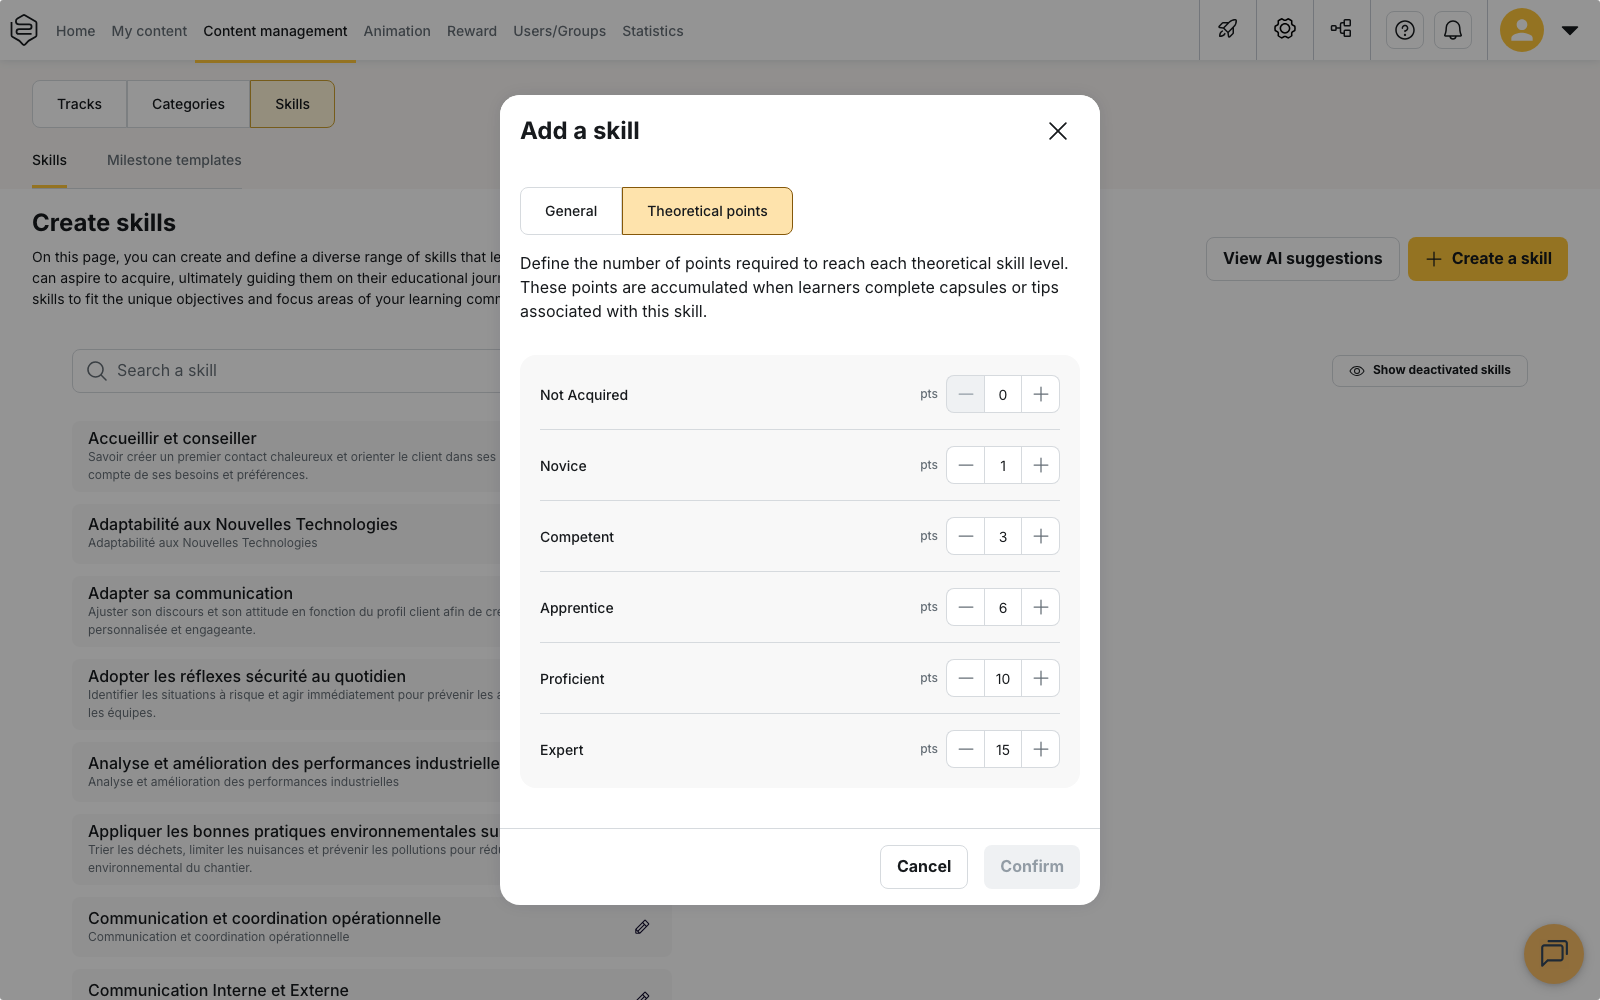
To learn more about the levels, see Mastery levels. To learn more about the points, see Attaching skills to content.
Skills are listed in alphabetical order. Use the search field to find a skill. A skill assigned to a group is only visible within that group.
💡 Tip: choose a familiar name that your teams already use. This name helps you identify the skill when searching for it, linking it to content or viewing statistics.
Organising your skills
Skills groups let you organise skills by theme. They are identified by a folder icon. Click a group to expand it.
Example: a skills group named “Languages” would contain the skills “English”, “German”, “Chinese”, and so on.
- Click Create a skill, then Create a skills group.
- Enter the name of the group and its description.
- Select the existing skills you want to add to the group. The same skill can belong to several groups.
- Click Confirm to save.
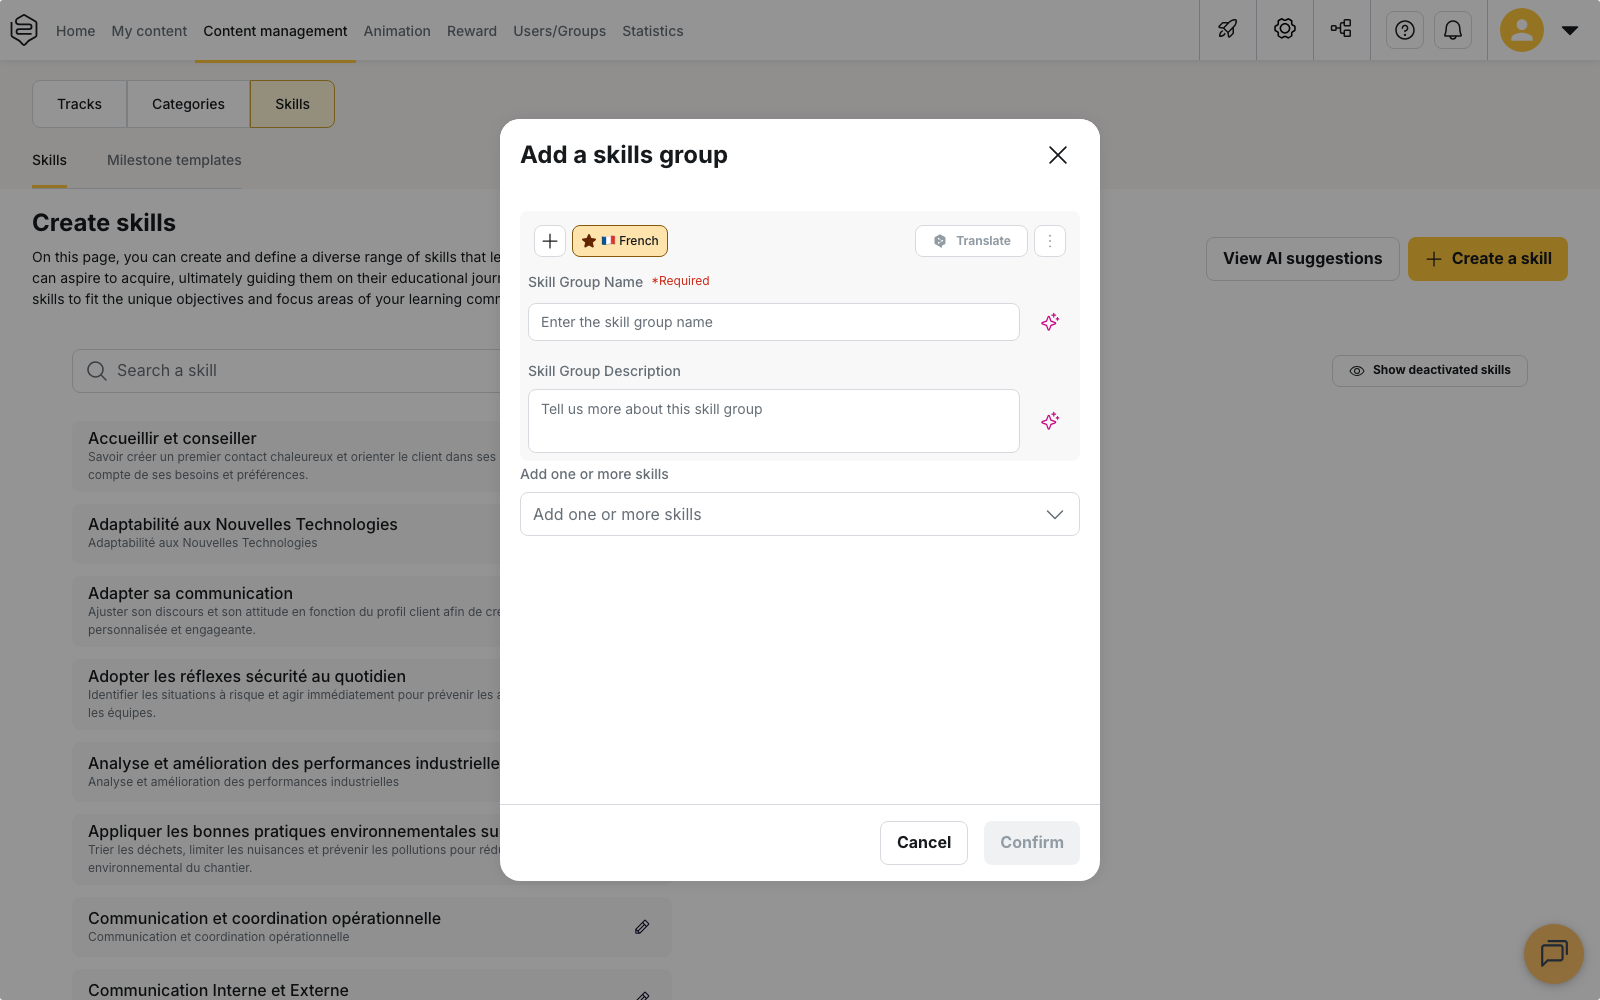
⚠️ Translation: the name and the description are entered language by language. To translate, click the ”+” and choose the language. You can translate automatically by clicking Translate.
Once you have created a group, expand it and click Create a skill to add a skill directly to that group. Skills always appear before groups in your list.
Using AI to build your framework
Clicking Create a skill > Scan with AI to analyse your back-office and generate a suggested skills framework. The AI uses the roles listed under Content > Glossary > Roles to suggest relevant skills.
These roles include those you have added manually and those created automatically by the AI. The AI creates roles by analysing your capsules with the status “Online” or “Awaiting publication”, your tips that are not in draft status, and your PDF media.
Once the scan is complete, click View AI suggestions to see the suggested skills and skills groups. Each row contains one suggestion. Select the suggestions you want to add, then click Create selected competencies to create them.
If you want to run the scan again, click Rescan.
Deactivating and reactivating skills
If a skill or a skills group is no longer relevant, you can deactivate it by clicking the pencil icon, then Deactivate skill. You can still access the statistics for that skill.
To reactivate a skill or skills group, click Show deactivated skills, then Activate. The button is only visible when you have at least one deactivated skill; otherwise it is not visible.
Skills cannot be deleted. Clicking Deactivate skill at the bottom of the dialog removes the skill from the learning platform without deleting any data. Previously awarded levels remain visible in the statistics, and evaluation continues for the the skill-based certificate that requires the skill.
Skills accross hierarchy
A skill created in the main account is not visible within a department. Skills are department-specific. To make a skill visible within a department, create it in that department. Within a department, you can view its skills and those of its sub-departments.
Going further
- Attaching skills to content: learn how to link content to skills so learners can progress.
- Mastery levels
- Assessing and following skills: learn about milestones and who awards mastery levels.
- Common problems: skills: find help with missing skills, empty groups and levels that do not progress.