Points and avatars
Your learners earn points as they carry out activities on the platform. These points allow them to:
Points and avatars
Your learners earn points as they carry out activities on the platform. These points allow them to:
- Level up their avatars (total points earned)
- Move up the rankings, based on your selectind scoring method (cumulated points, first attempt, last attempt)
- Unlock any badges you have set up
Points cannot be exchanged for anything on the platform.
Avatars are set in Configuration > Customization > General customization. To find out who can access this page, see Assigning rights.
How points are earned
A learner’s total is the sum of the points earned by completing capsules or revision sessions.
Within a capsule:
- A correct answer is worth 5 points in an entry quiz and 10 in an end quiz. If bonus points are enabled, a learner can earn 1 or 2 extra points per question depending on how quickly they answer.
- You can configure bonus points in the notion’s setting, to be awarded when the learner succeed it.
- You can configure bonus points for completing a series of quizzes in the overall quiz settings.
- You can set bonus points for completing a capsule, regardless of the learner’s score. By default, completing a capsule is worth 10 points.
- If you include a “simulation” content, you can set the number of points awarded for successfully completing it.
All the points a capsule available in a capsule are summarised in the “Settings” tab, in the “Points calculation” block.
⚠️ SCORM content awards points based on the maximum score set (see Importing a SCORM module).
In a revision session
A revision session earns 1 point per correct answer.
⚠️ The points mentioned here are not related to skills. To learn more about skill-related points, see the Skill levels article
Setting up the avatars
Avatars illustrate how the learner progresses on the platform.
To configure them:
- Open Configuration > Customization > General customization. Scroll down to the Avatars management block.
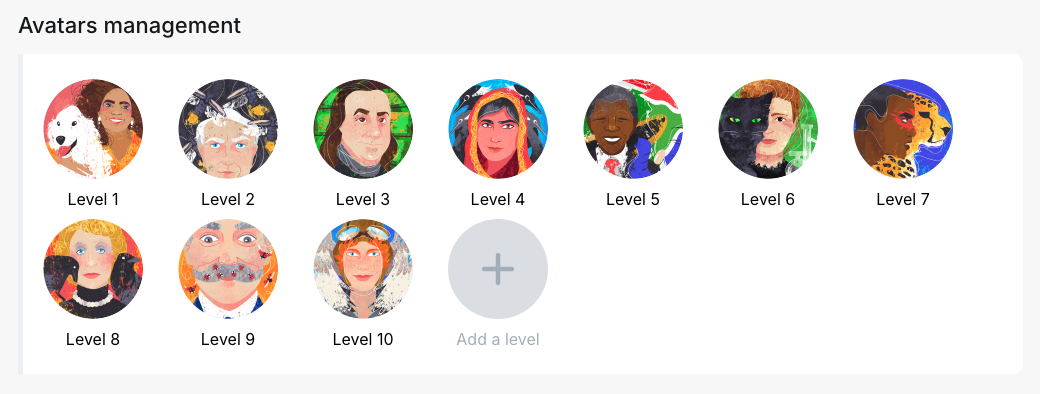
- To edit an avatar, click the avatar for the level you want to edit. The level editing window opens. To add an avatar, click “Add a level”.
- Enter a Name and a Description (205 characters maximum).
- Set the threshold in Points. The default value is 0. You can adjust it in increments of 5. By default, the rule is the following: the avatar of the next level is worth twice the avatar of the previous one. For example: if avatar 2 requires 50 points, avatar 3 will require 100, and so on.
- Choose the visual: upload an Image or use Import SVG. ⚠️ You can use either an image or an SVG, but not both. TThe most recently selected visual replaces the previous one for that level.
- Save the level.
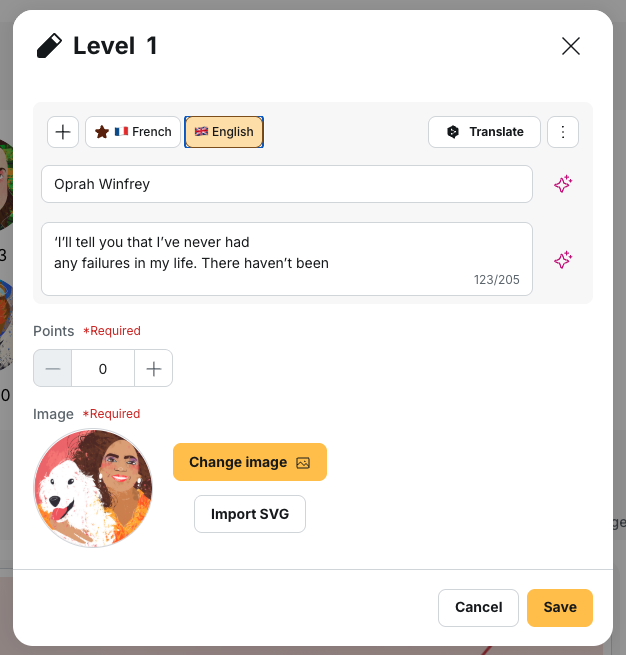
All four pieces of information are required: without a name, a description, a threshold and a visual, saving is not possible.
You must have at least 10 avatars. You can add more, but you cannot go below that number.
⚠️ Set point thresholds that keep learners motivated. If avatars are too easy to unlock, learners may reach the final level too quickly and have no further avatars to work towards. If the thresholds are too high, learners may feel discouraged.
Translating the avatars
Enter the name ane description separately for each language. To translate them, click the ”+”. You can translate automatically by clicking “Translate”. Remember to save.
Accounts with departments
By default, the avatars of the parent account are used by the various departments.
You can however customise the avatars per first level department. To do so, from the parent account:
- Open Configuration > Select a department > Customization > General customization. Scroll down to the Avatars management block.
- Edit your avatars as explained above.
On the learner side
The learner’s avatar is visible on the “For me” tab. If they tap it, they can see the points earned, the name and the description. They can also view the avatars they have already unlocked and preview those they have yet to unlock.
Going further
- Activity formats: learn how to set points for questions and quizzes and configure time limits for speed bonuses.
- Gamification and engagement: rankings configured based on points
- Badges: badges can be awarded when a specific points total is reached.
- Customizing the learner platform:explore the other learner platform customization options.