Creating and organising user groups
A group brings together learners who receive the same content. This article explains how to create a group, configure it, add learners to it and organise the list of groups, from the Users/Groups tab. For what a group is and what it controls, see Understanding groups.
Creating and organising user groups
A group brings together learners who receive the same content. This article explains how to create a group, configure it, add learners to it and organise the list of groups, from the Users/Groups tab. For what a group is and what it controls, see Understanding groups.
⚠️ Rights required to create and organise groups: the Allowed to create new diffusion groups right to create a group, and the Allowed to update diffusion groups right to change its membership or its options, or to deactivate and reactivate it.
Creating a group
- Open Users/Groups > Groups list.
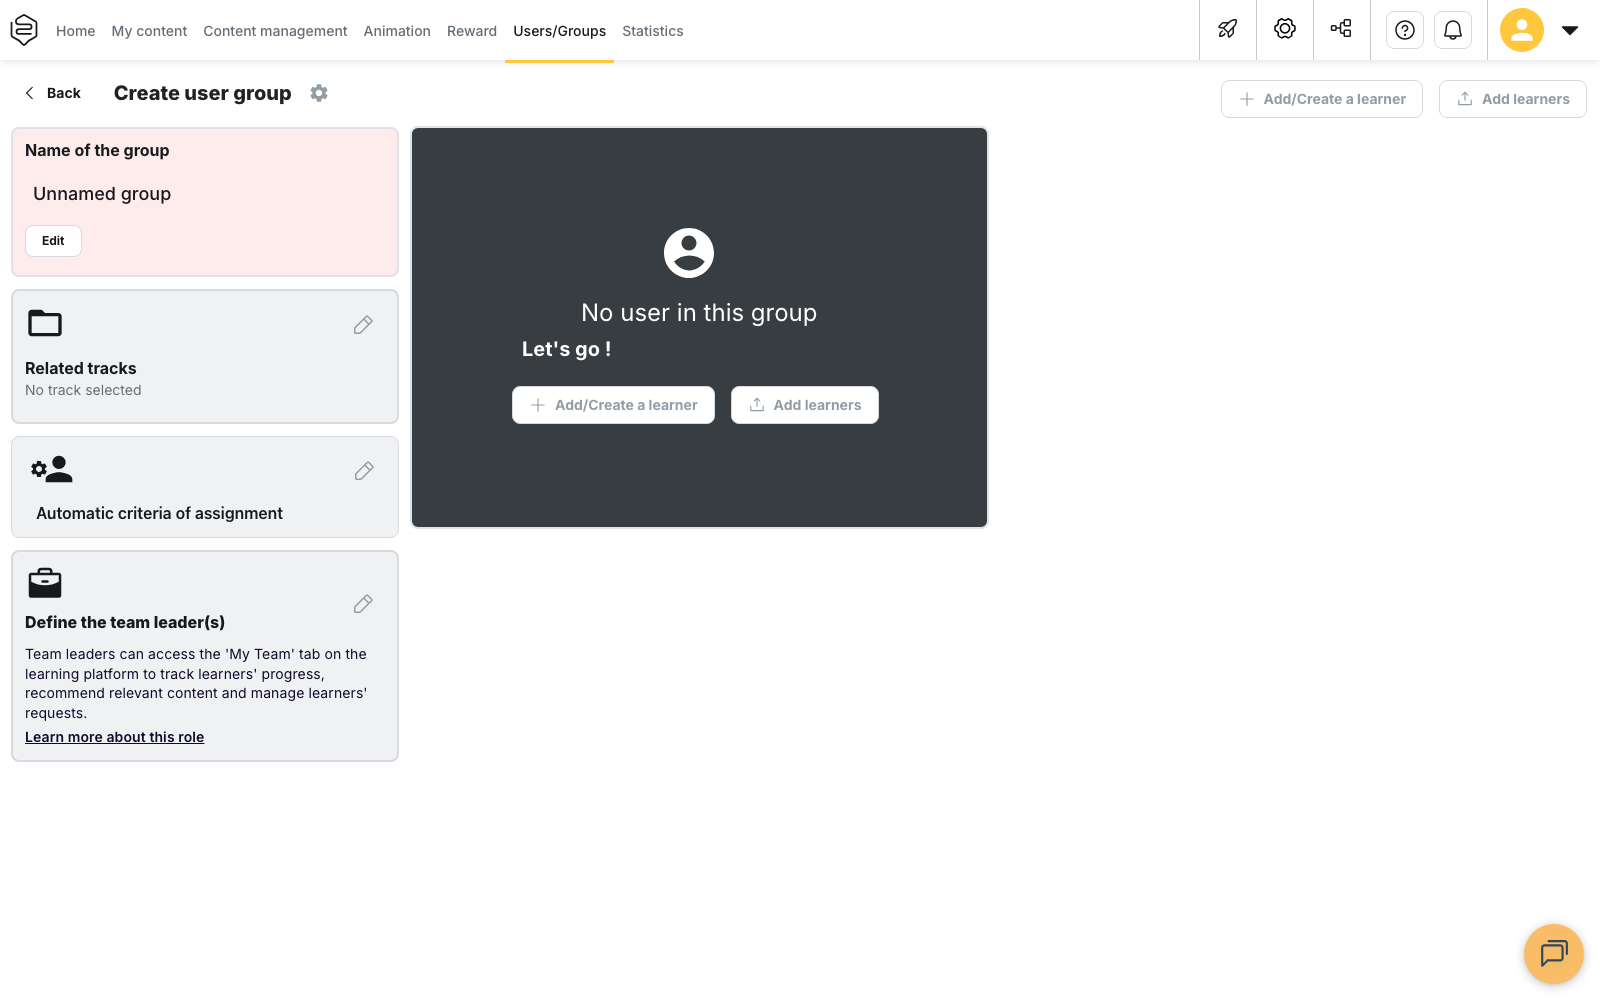
- Click Create a group. The Create user group screen opens, with the default name Unnamed group.
- In the Name of the group card, click Edit and enter the group name. The group is created and the screen becomes Modify user group.
💡 Tip: choose a name that stays readable in a long list. If you are deploying in waves, create one group per arrival wave so that you can, for example, compare the waves in the statistics (Pilot and launch).
Once the group is named, the screen also shows the Parent group, Related tracks, Automatic criteria of assignment and Define the team leader(s) cards. The pencil on each card opens its setting.
A new group only contains the learners you add to it. To have it fill itself automatically from your users’ data, see Dynamic groups.
Attaching the group to a parent group
The Parent group card attaches the group to another group, which builds a tree of groups. Select the group in the Select a parent group list. This card appears once the group has been created.
Do not confuse the parent group with the department: the parent group organises your groups among themselves, while the department partitions administration. Both structures coexist.
Adding and removing learners
Two buttons add learners to the group: Add/Create a learner, to find or create them one by one, and Add learners, to import them in bulk. Both modes are detailed in Adding users. On an SSO account, learners are added by identifier.
Removing a learner from the group removes their access to the content this group distributed, without notifying them. If they belong to other groups, they keep the access those groups give them.
Configuring the advanced options
- On the Modify user group screen, click the gear icon to the right of the title. The Advanced options panel opens on the General tab. The gear icon stays inactive until the group has been created.
- Change the settings you need (see below).
- Click Save.
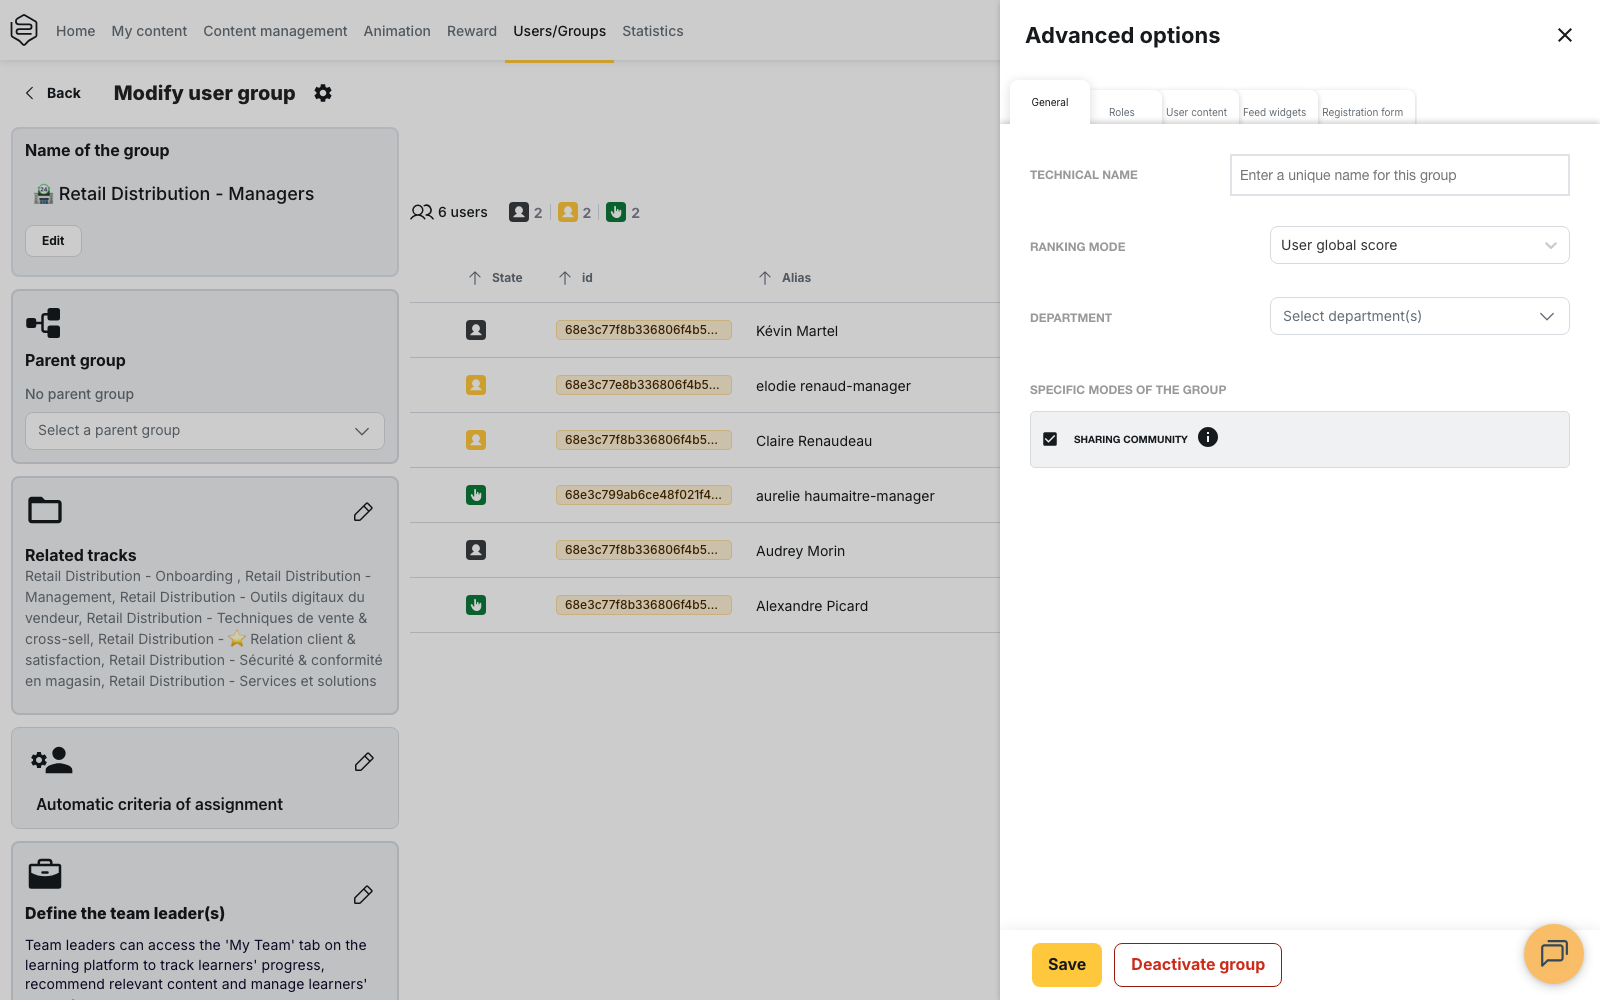
The General tab contains:
- Technical name: a unique identifier, useful when an HRIS or an API refers to the group. Once filled in, do not change this field.
- Ranking mode: the leaderboard shown to the group’s learners. You can choose No ranking, User global score, User score on group’s capsules, or that same score calculated on the first attempt, latest attempt or best attempt at those capsules.
- Department: the department the group is attached to, on an account organised into departments.
- Specific modes of the group: checkboxes that only appear when the corresponding feature is
enabled on your platform:
- Primary group: offered when your platform’s leaderboard only counts users from primary groups. If the box is not ticked, this group’s learners do not appear in that leaderboard.
- Sharing community: the group becomes a social learning community.
- Self-registration group: learners can join this group by themselves.
- Learner management by managers from the application: team leaders create or delete accounts from their app. Tick the box, then set the maximum number of learners in the group; it cannot be lower than the number of active learners. The manager cannot create more accounts than the number of places set (Setting up a team leader).
Depending on your platform’s options, the panel offers other tabs, for example Roles, User content, Feed widgets or Registration form.
⚠️ Changing a group’s department does not reassign the related tracks and capsules: they are reassigned separately. See Modelling your company org chart.
Organising the list of groups
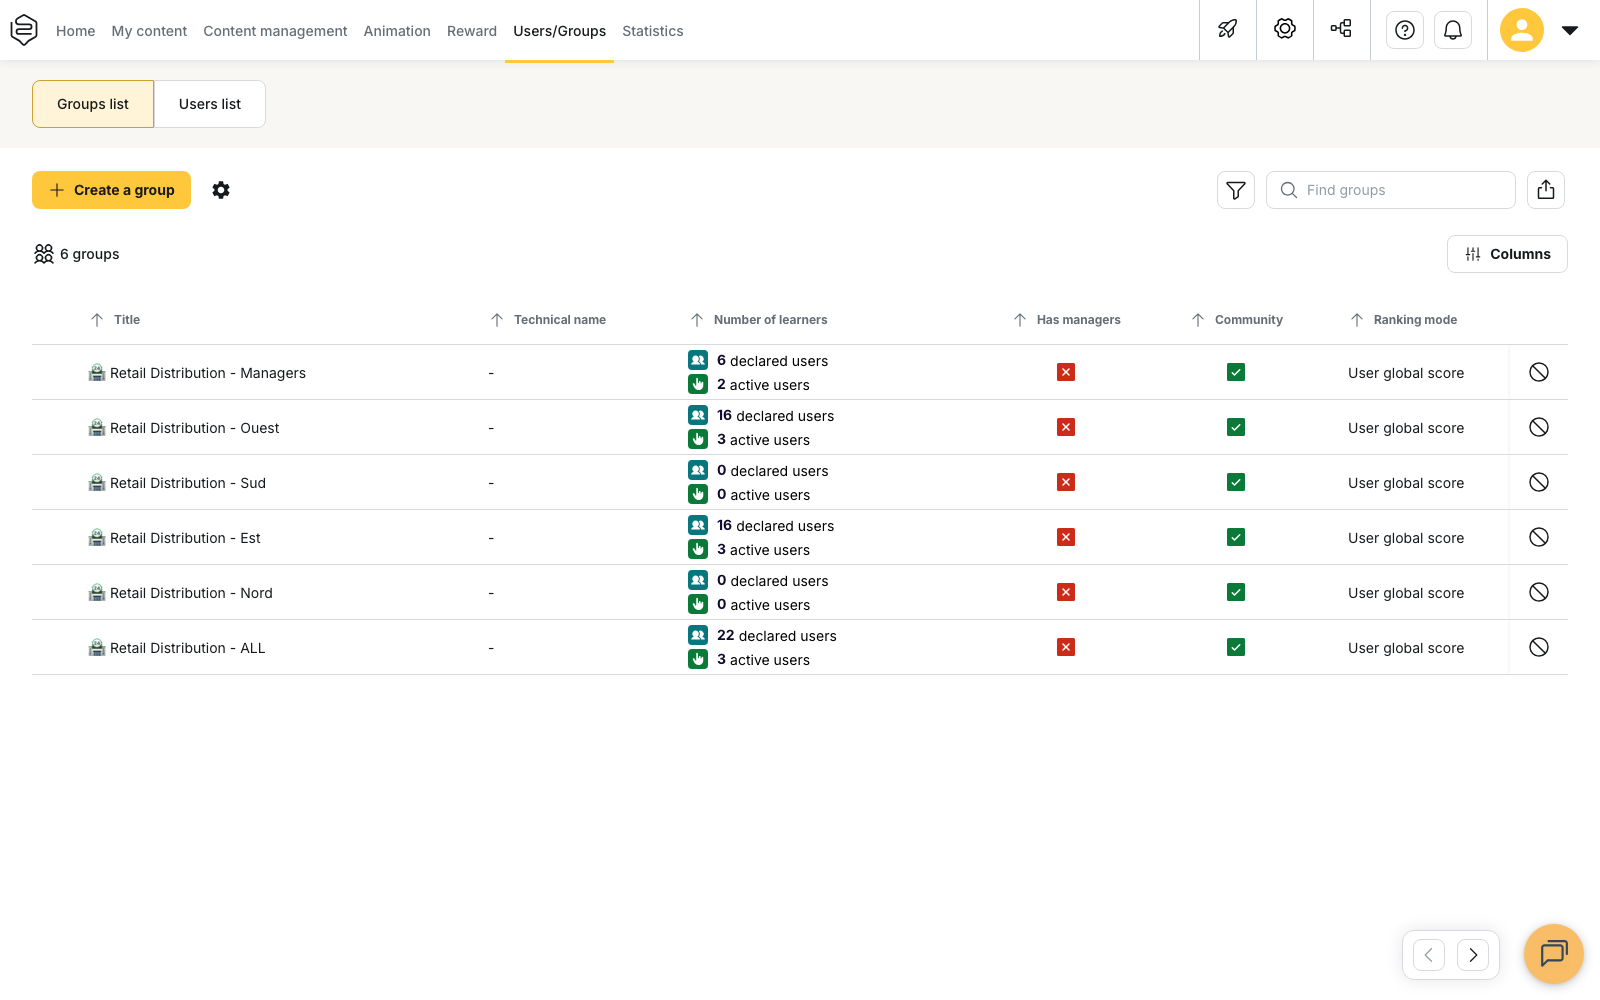
The Find groups field filters the list by title. The Columns button chooses the displayed columns, and clicking a column header sorts the list.
Filters can be combined and then saved: New filter keeps the current combination, which you then find in Saved filters, under My filters or Common filters.
Editing several groups at once
Select several groups: the Edit button appears, followed by Deactivate or Reactivate depending on whether the selection contains active groups, deactivated groups or both. Edit changes, in one go and on all selected groups, the Ranking mode, Primary group, Sharing community and Coach(es). Department is added to this list on an account organised into departments.
Deactivating and reactivating a group
A group cannot be deleted: it is deactivated instead. You can deactivate a group from its row in the list, with Deactivate, or from the Advanced options panel, with Deactivate group. A Deactivate group confirmation is requested before the change is applied.
Before deactivating, check what the group distributes from Viewing and managing the tracks linked to a group.
A deactivated group disappears from the list. The Show disabled groups button brings it back and then becomes Hide disabled groups. This button only appears when at least one group is deactivated. To reactivate the group, use Reactivate.
If an administrator cannot see a new group
A newly created group is not automatically added to permissions limited to a named list of groups. If an administrator whose access is restricted this way cannot see the new group, add the group to the list in their authorisation model.
Going further
- Understanding groups: what a group is, and everything it controls.
- Adding users: search, creation, import: the add modes in detail, and the SSO case.
- Dynamic groups: automatic membership criteria: filling a group from your users’ data.
- Who can distribute what: distribution rights: configuring who can see and edit which groups.