Configuring the AI
⚠️ Rights needed: access to the Configuration.
Configuring the AI
⚠️ Rights needed: access to the Configuration.
The AI Configuration page sets, for the whole account, how the AI speaks to your learners, in generated content and in the agents alike. It has two parts, General settings and Image settings. It does not configure the agents themselves: enabling them, restricting them by group and the voice mode all live in the AI Agents tab of the Content section.
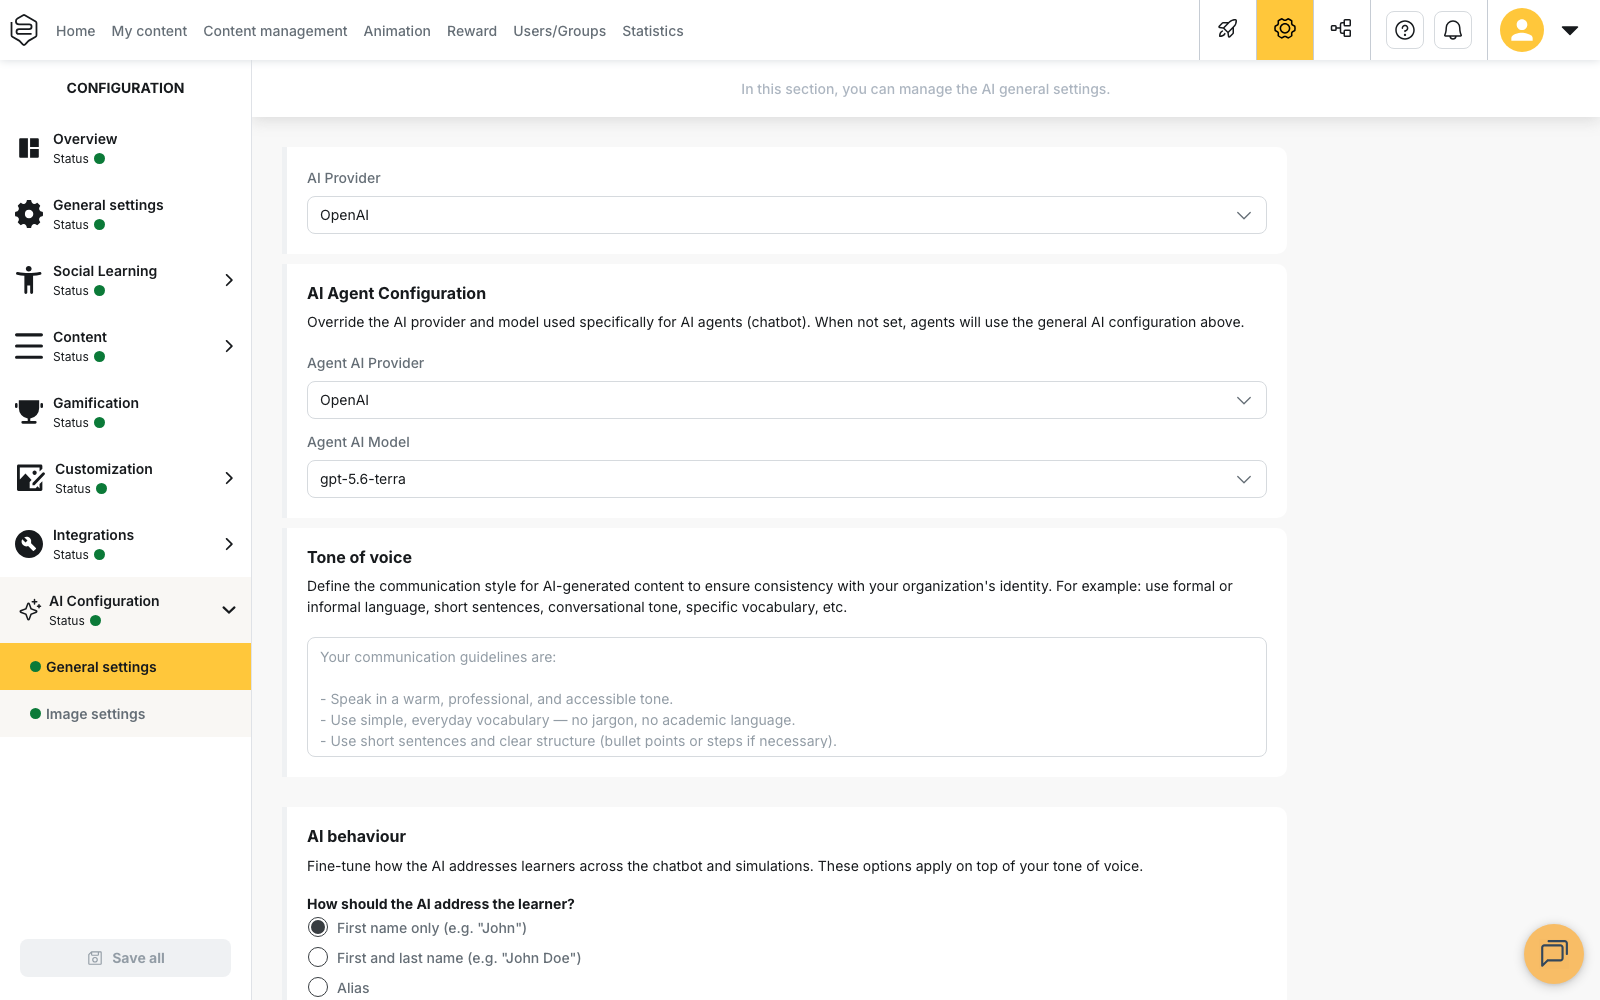
Click Save all to apply your changes.
Provider
You choose the AI Provider used for AI generation.
When the AI model is managed through external OpenAI integration settings, a warning tells you to change it in the External Services configuration, not here.
Tone of voice
The Tone of voice field takes your communication guidelines, and they apply to everything the AI generates. The platform’s example starts with: “Speak in a warm, professional, and accessible tone.”
💡 Tip: write these guidelines with whoever owns internal communication. They are read on every generation, so a change here shifts the wording of all future generated content at once.
Behaviour
The AI behaviour section fine-tunes how the AI addresses learners in the chatbot and the simulations, on top of the tone of voice.
How should the AI address the learner? offers First name only (e.g. “John”), First and last name (e.g. “John Doe”) and Alias.
Formality offers Informal (tu), Formal (vous) and Let the AI decide. With the last one, the register can vary from one answer to the next; avoid it when your company culture is settled on one.
Allow the AI to use emojis closes the section.
Image settings
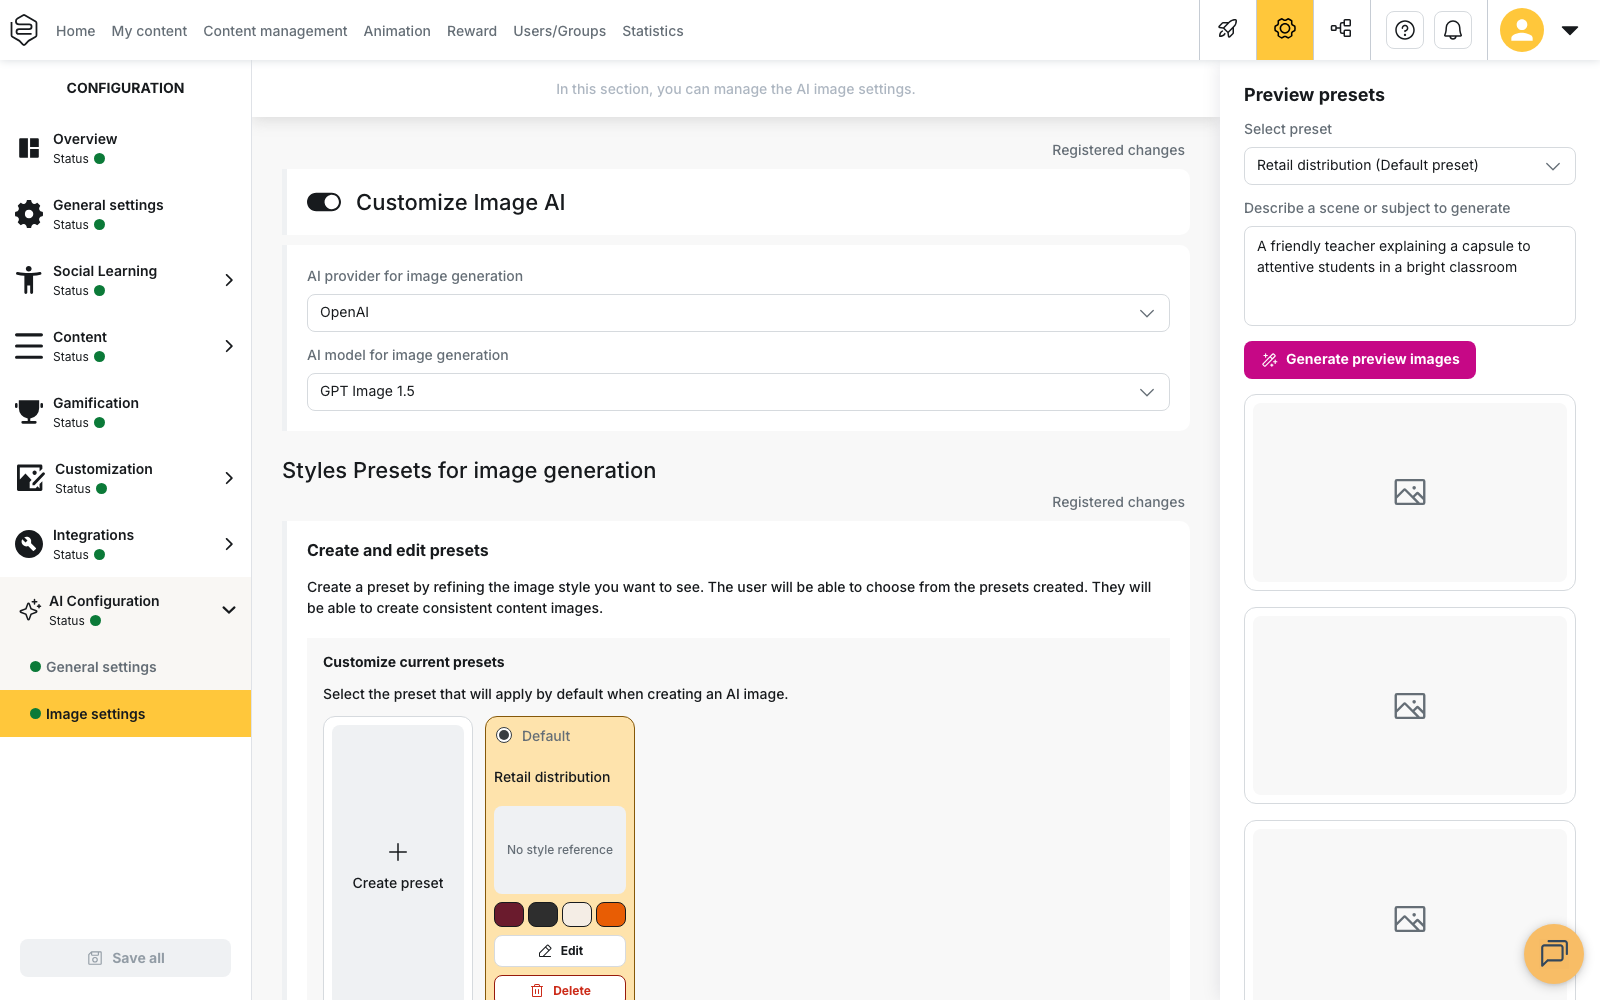
The Image settings part has its own Customize Image AI block: an AI provider for image generation and an AI model for image generation, separate from the text ones if you need them to be.
Styles
A style describes how generated images should look. The Image generation style block separates the Default generation styles, provided by the platform, from the Custom generation styles that you create.
Create style opens Create your own generation style. Fill in a Style name and a Style hint: technique, lighting and overall aesthetic. The platform’s example: “Minimalist illustration with clean lines and simple shapes, soft shadows and a friendly feel.” Generate cover image then produces images from a scene you describe, and you pick one as the style cover. That cover is how the style is recognised in the library.
Presets
The preset is what your authors actually pick. The Create and edit presets block combines a style and a colour palette under a name.
Create preset opens a three-step wizard.
- Image generation style: turn on Use an image generation style, then choose a style from the library. You can also create a style without leaving the wizard.
- Color palette: turn on Use color palette, then add your colours. The palette takes 4 colours at most. These colours guide the AI’s choices, but they can appear with variations in the generated images.
- Preset Summary: fill in the Preset name, then save.
A preset needs a name and at least one of the two: both switches can be off, but not at the same time. Otherwise the platform answers “Please select at least a generation style or a color palette”.
The Customize current presets block selects the preset that applies by default when an image is created.
💡 Tip: as long as no preset exists, your authors read “No preset available (Create one in the AI configuration)” where the choice should be. Creating a first preset turns that message into a usable list.
Going further
- Who are our learning agents?: enabling the agents, restricting their access by group and setting up voice mode.
- Generating a capsule with AI: AI generation on the author’s side.
- The home page and the menu: the alias your learners can pick, the one the AI can use to address them.